We’re currently evaluating Mendix as a low code platform for work, primarily to replace a bunch of old workflow apps that still run in our old old MOSS 2007 environment (Yes it is a problem).
A key feature that the platform must support for our architecture is single sign-on against out Azure active directory instance. Being new to the whole Mendix development environment it’s been a bit of a journey to get it working, not really due to the platform, more a few simple mistakes I made being new to it all.
For the most part you need to follow the steps in this article off the Mendix site: https://gettingstarted.mendixcloud.com/link/module/115/lecture/938
In your project you need to first enable security which will setup basic Administration and User roles.
Next you need to import (as per the instructions linked above) the SAML and MxModelReflection modules. Make sure you map the module permission groups to the main project user groups via the main project “Security” config – “User Roles”.
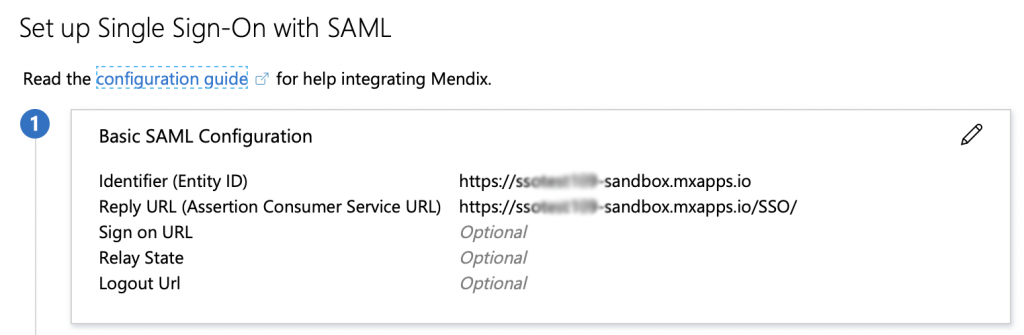
The SAML module is a bit weird as the config happens at runtime, so you have to deploy to the cloud at this point and take note of the sandbox URL as you need this in the Azure config.
Azure AD Admin
Here is some other information that you’ll need specifically for authenticating against Azure AD:
First up you need to create the app endpoint in your Azure AD administration console, be careful to create it under the “Enterprise applications” not the Regular “App registrations” that you use for your own .Net code.

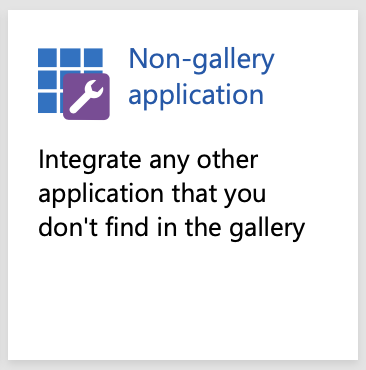
Don’t be put off by the fact that the catalog doesn’t contain a reference to Mendix, it’s not very clear but you press the “Non-gallery application” button near the top of the gallery to add a new generic single single on app to configure.
Once you’ve given it a name you need to configure “Single sign-on”, in here you need to add the source url your app will be calling from and the reply URL.
One last thing to do on the Azure AD side is add at least one user or group to the “Users and groups” section, this defines who in your directory will have access to log into the Mendix app.
Now quickly copy the “App Federation Metadata URL” from the Single Sign-on setup page and view you app.

SAML Config
As you’ve got security enabled you’ll have to log in as “demo_administrator” demo user as access the “SAML.20.OpenConfiguration” micro flow you added to the navigation.
Click to add a new IdP Configuration:
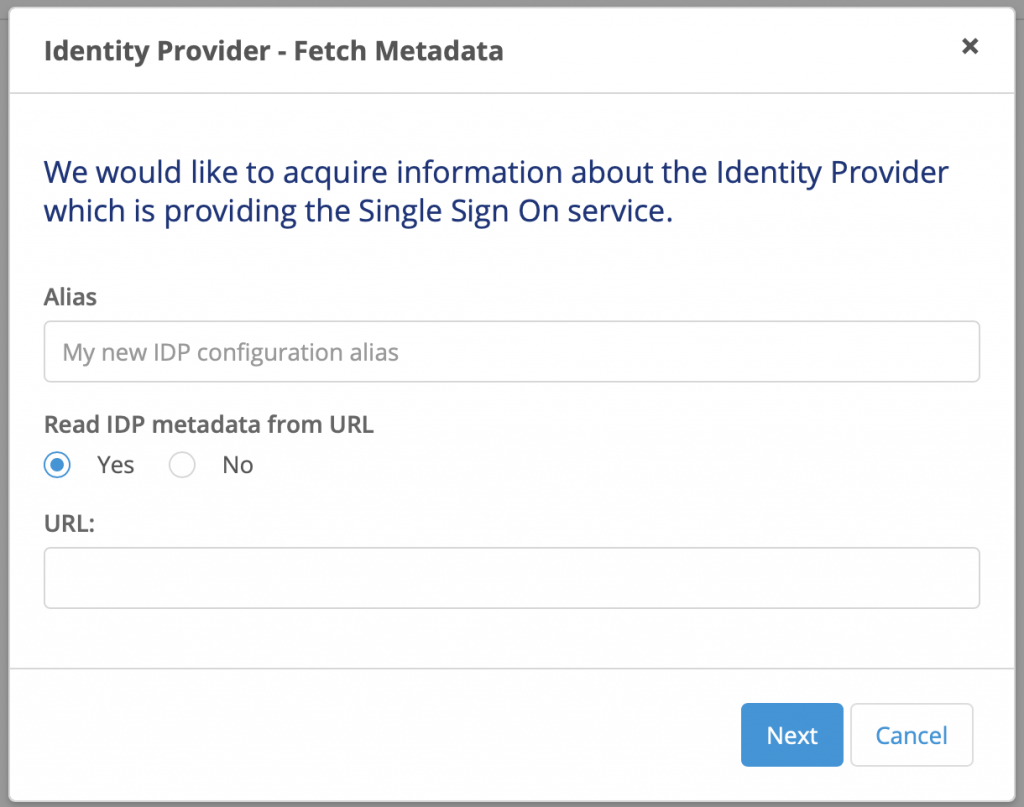
Give it a name and add the “App Federation Metadata URL” you copied from Azure AD. This will read all the certificate information it needs to connect to authenticate.
Add “Authentication context classes”, I just added all of them: Add – Select All – Select.
On the first “Mapping” screen simply select “Use Name ID” and next.

On the second mapping screen, if you got the MxObjects reflection thingy working properly (should pop up the first time you run the SAML config, select all and hit refresh), you should be able to select Administration.Account and Email.
If it’s not right you can add the page “MxModelReflection.McObjects_Overview” to the navigation of your project to refresh the objects again.

As you most likely won’t want to have to create every user in the app manually you’ll want to turn on “Allow the module to create users” and the default new users to the “User” role.
Just in time provisioning
This bit is a little tricky as for some reason the claims from Azure AD aren’t automatically populating (you can check them by opening the XML file you used to read in the config earlier).
Add a New attribute entry into the Just in time provisioning list. You’ll notice the claims drop down has nothing in it. Hit the “Search” button to access the claim attribute edit screen.
Add the following 2 claims:
- Name: http://schemas.xmlsoap.org/ws/2005/05/identity/claims/name
- Name format: string
- Friendly name: Email
- Name: http://schemas.microsoft.com/identity/claims/displayname
- Name format: string
- Friendly name: DisplayName
Select one of the newly created items and press select (weird UX here) and you should be back at the “Claim map” screen and “Claim” drop down should now be populated with the Azure AD claims we just entered.
Create 2 Claim and User attribute mappings as shown below:

Save at this point and don’t forget to select your newly created entry and hit “Toggle Active”
Assuming we’ve got everything right you should be able to now access the SSO login url (https://{yourappname}-sandbox.mxapps.io/SSO/ )and be authenticated to your app!
Thanks, helped me a lot